Determine the Suitable Type of Loft Conversions
When deciding on the ideal loft conversion for your needs, three key factors come into play:
- Roof Type – The type of roof in your house will impact the most suitable conversion option.
- Intended Use – Consider how you plan to utilise the loft space once converted.
- Budget – Your available budget will also influence the choice of conversion.
Typically, three types of loft conversions are internal, dormer, and loft conversions that need complete removal and build. Remember, each has sub-types; read this section thoroughly to choose one that suits you.
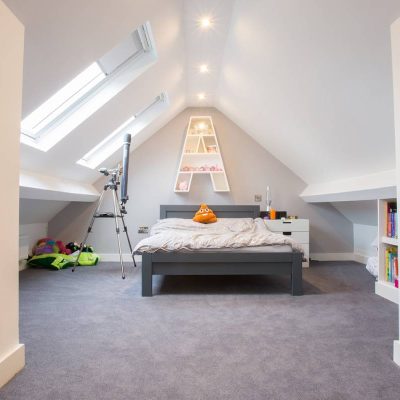
Internal Loft Conversions
As the name suggests, this type of conversion involves maximising the existing space within the loft without making significant changes to the roof’s structure. It is a cost-effective option that works well when creating additional rooms, such as bedrooms, offices, or playrooms.
The following are the types of internal loft conversions.
Conversion Type | Description | Advantages | Disadvantages |
Roof Lights | Add windows, insulation, and floor strengthening to the existing roof slope | – Cost-effective | – Limited additional space |
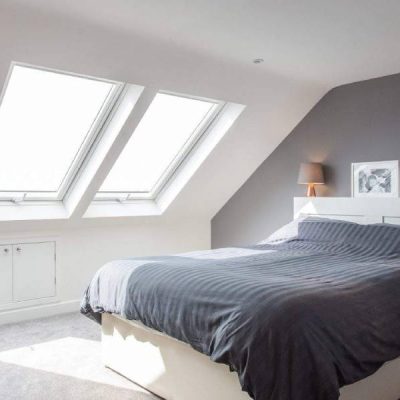
Dormer Loft Conversions
A dormer loft conversion expands the existing roof vertically to create additional headroom and floor space. This type of conversion is suitable for adding extra space and functionality, especially in scenarios where the existing loft area has limited headroom.
The following are the types of dormer loft conversion.
Conversion Type | Description | Advantages | Disadvantages |
Single Dormer | Addition of dormer windows to increase space and add symmetry, suitable for conservation areas | – Favoured by planners in conservation areas | – Limited additional space |
Side Dormer | Addition of dormer windows to increase head houses’ height with a hipped roof | – Increases head height for specific roof types | – Limited to houses with hipped roofs |
Hip-to-Gable | Replacement of hip roofs with gable walls to make additional space with full headroom | – Adds extra space with full headroom | – Requires alteration of roof structure |
Full-Width Dormer | Provides maximum space and unique loft layout | – Maximises available space | – Requires sufficient roof space for construction |
L-Shape Dormer | Suitable for specific properties like Victorian houses with rear additions | – Delivers a significant amount of additional space | – Limited to specific prop |
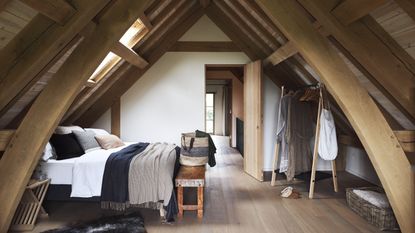
Roof Conversions Requiring Removal and Rebuild
Unlike the internal and dormer loft conversions, this conversion option involves removing the existing roof structure and rebuilding it to create a new space. It provides the ultimate flexibility in terms of design and layout possibilities. However, this type of conversion tends to be the most time-consuming and costly.
The following are different types of these loft conversions.
Conversion Type | Description | Advantages | Disadvantages |
Mansard Conversions | Replacing one or both slopes of the roof with steep sides and a flat roof | – Makes adequate volume for an additional storey | – Requires planning permission |
Prefabricated Loft | Replacement of the existing roof structure with larger prefabricated trusses | – Quick assembly process | – Temporary inconvenience during construction |
Check & Obtain the Necessary Permissions
Check Permitted Development Rights
Determine if your loft conversion falls within the permitted development rights. Typically, you can extend your roof space to 50m3 (or 40m3 for terraced housing) without planning permission.
However, ensure that the allowance hasn’t been previously used up or removed. Strict limits must be followed, such as no additions beyond the existing roof slope and using similar materials.
If your conversion exceeds the permitted space allowance, is in a conservation area, or falls under designated zones, you will need full planning consent.
Seek Professional Guidance
You can also consult with experts who can help you navigate the planning permission process and provide guidance on permitted development rights. Kickstart a consultation to receive assistance tailored to your specific project.
Building Regulations Approval
Loft conversions necessitate compliance with Building Regulations, regardless of whether planning permission is required. It is advisable to pursue a full plans application approach, where you obtain approval for a comprehensive scheme prior to engaging a builder.
This reduces risks and allows the builder to provide a fixed quotation based on the approved design. Building Control officers will review the undergoing work at many stages, and upon completion, they will issue a completion certificate. Hold off on settling the final accounts until you receive this certificate.
Notify Neighbours
If your house is semi-detached or terraced, it is crucial to notify your neighbours about your loft conversion plans. This requirement falls under the Party Wall Act 1996, which ensures that neighbouring properties are informed, and any potential impact is addressed.
Prioritise Safety
As of April 2015, homeowners are accountable for safety on their home projects, regardless of the project’s size. Develop a health and safety plan for your loft conversion and manage it accordingly to ensure a safe working environment.
The Typical Construction Process
The exact construction process for a loft conversion project can vary depending on the conversion type, budget, design, clients’ needs, etc. However, the following are the general steps involved in every loft conversion.
Roof Work
The first step is to work on the roof. This may involve removing existing tiles or slates, installing new rafters, and adding insulation. If you are adding a dormer window, this will also be accomplished during this step.
Building Walls
Once the roof is complete, the next step is to build the walls. This is usually done using timber framing, but brick or blockwork can also be used. The walls will need to be insulated to ensure that the loft is warm in winter and cool in summer.
Constructing Flooring
The floor is usually made of timber joists, with insulation and floorboards on top. If you add a kitchen or bathroom, the floor must be waterproofed.
Installing Windows and Doors
The windows and doors will be installed once the walls are complete. It is important to choose energy-efficient windows, as this will help to keep the loft warm in winter and cool in summer.
Inaugurating Staircase
The staircase is usually the last thing to be installed. It is necessary to pick a staircase that is safe and easy to use.
Finishing touches
Once the construction is done, the loft will need to be finished. This includes painting the walls, installing flooring, and adding insulation. You can also add a bathroom, kitchen, or bedroom feature.
The Cost of a Loft Conversion
I have added a few tables for the different costs of a loft conversion project. You can check the tables and get an estimate for the cost you may need to complete it.
Note: These costs are based on historical data from August 2015 and may vary depending on factors such as location, the complexity of the project, and current market conditions.
It is always recommended to obtain detailed quotes from professionals and contractors for accurate cost estimates specific to your loft conversion project.
Loft Conversion Guide Price per Square Metre
Loft Conversion Type | Price Range per Square Metre (£) | Loft Conversion Type |
Simple Rooflight Conversion | £1,200 to £1,500 | Simple Rooflight Conversion |
Dormer Conversion | £1,680 to £2,400 | Dormer Conversion |
Note: Prices exclude VAT and fees.
Professional Fees for Your Loft Conversion
Professional Service | Fee Range (£) |
Architect’s Fees | £1,200 to £2,400 for planning drawings |
Building Regulations Fees | Under 40m2: £385, For 40 to 60m2: £460 |
Engineer’s Structural Design Fees | £600 to £1,800 |
Planning and Certificate of Lawful Development Fees | Planning Application: £172, Certificate of Lawful Development: £86 |
Building Control Fees | £960 to £1,200 |
Party Wall Arrangement Fees | Budget approximately £850 per neighbour |
Party Wall Arrangement Fees Budget approximately £850 per neighbour
Loft Conversion Building Works
Building Work | Price Range (£) |
Heating | Radiators: £30 per m2, Underfloor Heating: £45 per m2 |
Boiler | £1,800 to £3,500 |
Bathrooms | £4,500 to £11,000 |
Decorating | £77.00 per square metre for plastering or dry lining and paint |
Flooring | £24.00 per square metre upwards |